How To…DIY Dyeing – Dyeing Leather Tack
Click here to read the complete article388 – October, 2017
By Taylor Fabus
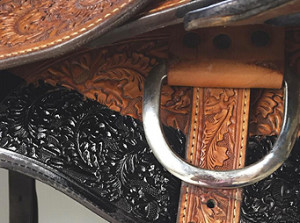
 Some of the brightest stars in horse show arena have the tiniest of details to thank for their jaw-dropping first impressions. In this piece, we go behind the scenes to share a trick of the trade: using dye to inexpensively enhance different aspects of your horse show turnout. Follow along for in-depth, step-by-step tutorials on dyeing leather tack, dyeing leather chaps, coloring boots, hats, and much more. Dye may also be applied to pieces of mismatched tack to create a more unified final look. Also, proper utilization of dye can bring new life to older, used tack. It’s important to note that higher quality leather will often be more accepting of the methods described below, and all products suggested.
Dyeing Leather Tack
Saddles, Headstalls, or Show Halters
Preparing the Tack
Step 1.
Take before pictures. A great tip is to take pictures of the tack from all angles. This will help–when you’re finished with the dyeing process–to remember exactly how everything went together. It may seem like an unnecessary step, especially since you’re likely working with a piece of equipment that you’re very familiar with, but it may help. Heeding this advice will likely save you some stress later.
Step 2.
Remove as much silver as possible. This will allow you to get the dye onto more of the leather and into all crevasses. Also, it will
make cleaning the silver a more effective process. Often, when removing silver, you may find a great deal more tarnish than you realized was there. This is especially true on a show halter, which is in direct contact with the horse’s hide. This contact allows for more dirt, sweat, hair, grooming products, and other irritants that can lead to your silver tarnishing and the leather wearing. Removing the silver from time to time is a good habit to get into in order to properly clean both the silver and leather. I recommend placing the silver and coordinating Chicago screws into a small plastic storage container to prevent losing any important pieces. This would also be the appropriate time to remove any billet straps, stirrups, fenders, etc. These smaller pieces are more easily dyed separately, once removed from the saddle.
388 – October, 2017


